
Use Adobe Photoshop to design canopies
Requirements
You’ll need a fairly recent version of Adobe Photoshop. A mouse will help, because you need to draw some simple shapes, but it’s not necessary. If you have another paint program like Fireworks or CorelDraw, the same features are there and you can probably adapt these instructions.
This tutorial explores some intermediate features of Photoshop. It will help to have a basic grasp of features like layers, lassos, color selection, and brushes, but if you follow the instructions carefully you should be able to make it work without too much trouble. It should take between 45 and 90 minutes to complete, but you will then have a “template” that you can use to very quickly try out new paint jobs.
Theory
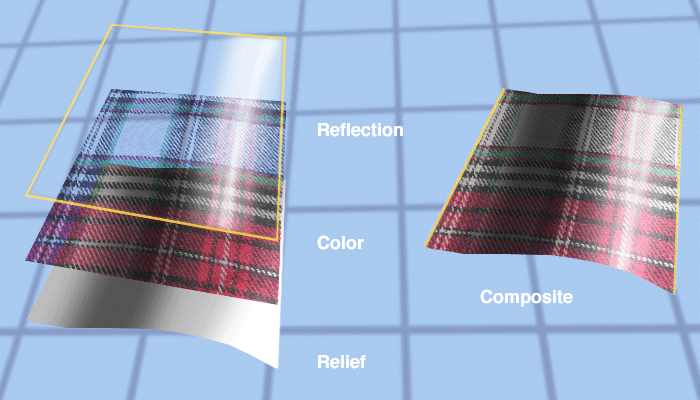
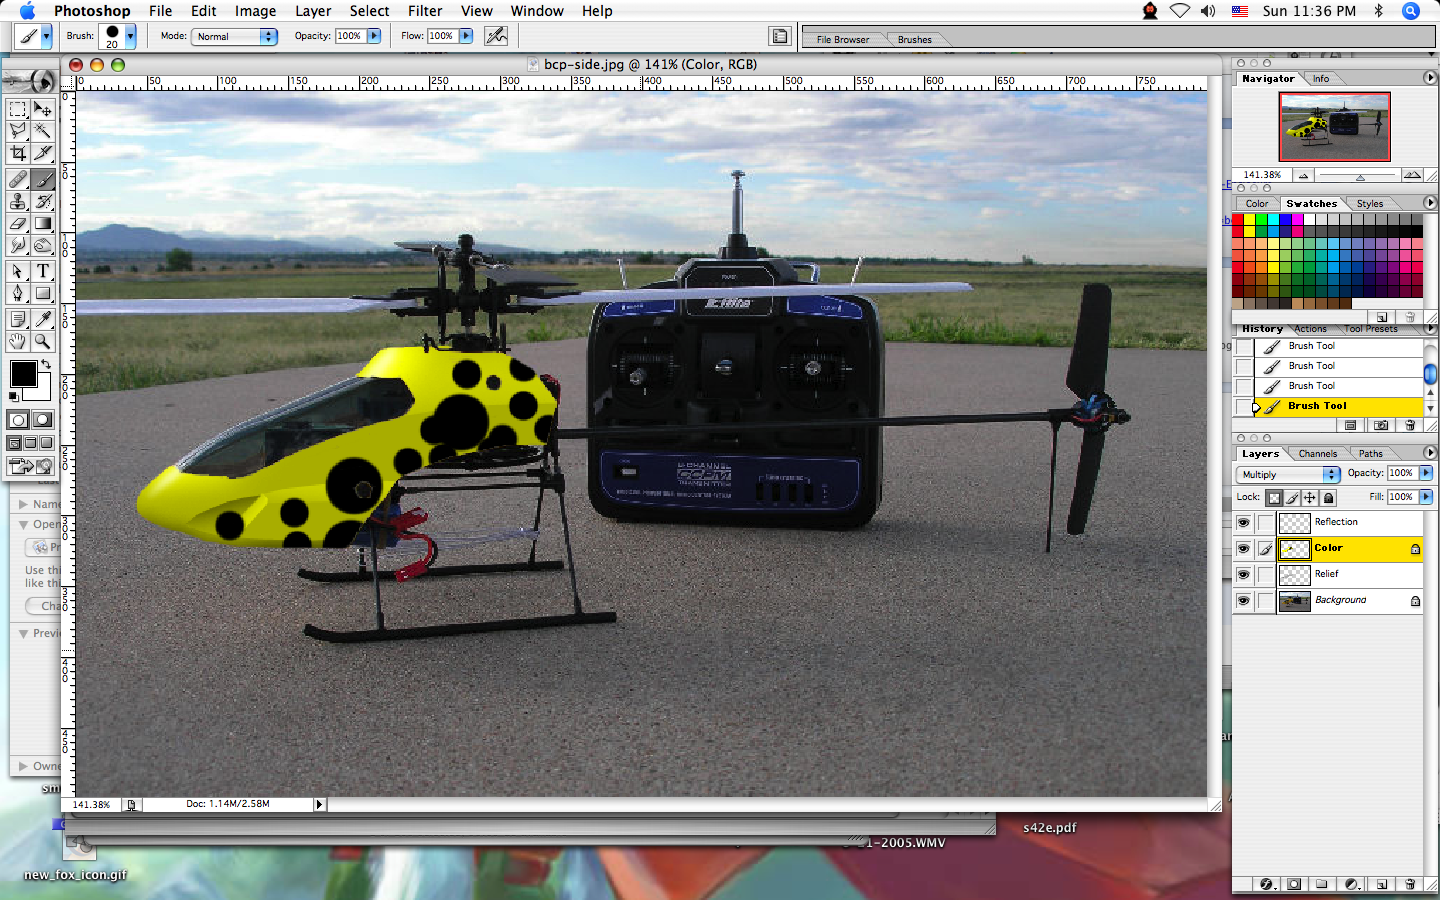
We will be using a Photoshop technology known as layers. Refer to the diagram at right. There are three layers floating on top of the background. The bottom one is shaded to give it relief or texture. The middle one is tinted so that it imparts color to the layers below it. The top one is mostly transparent; it just contains a little white paint to resemble a reflection from a glossy surface. We’ll take a photograph of our helicopter in its natural habitat and add these three layers, then set the layers up so that we can see what our canopy would look like painted.
Mac/PC terms
I use a mac. You are very likely using a PC, so I used the PC key combinations here. On the mac, replace control with command and alt with option.
Instructions
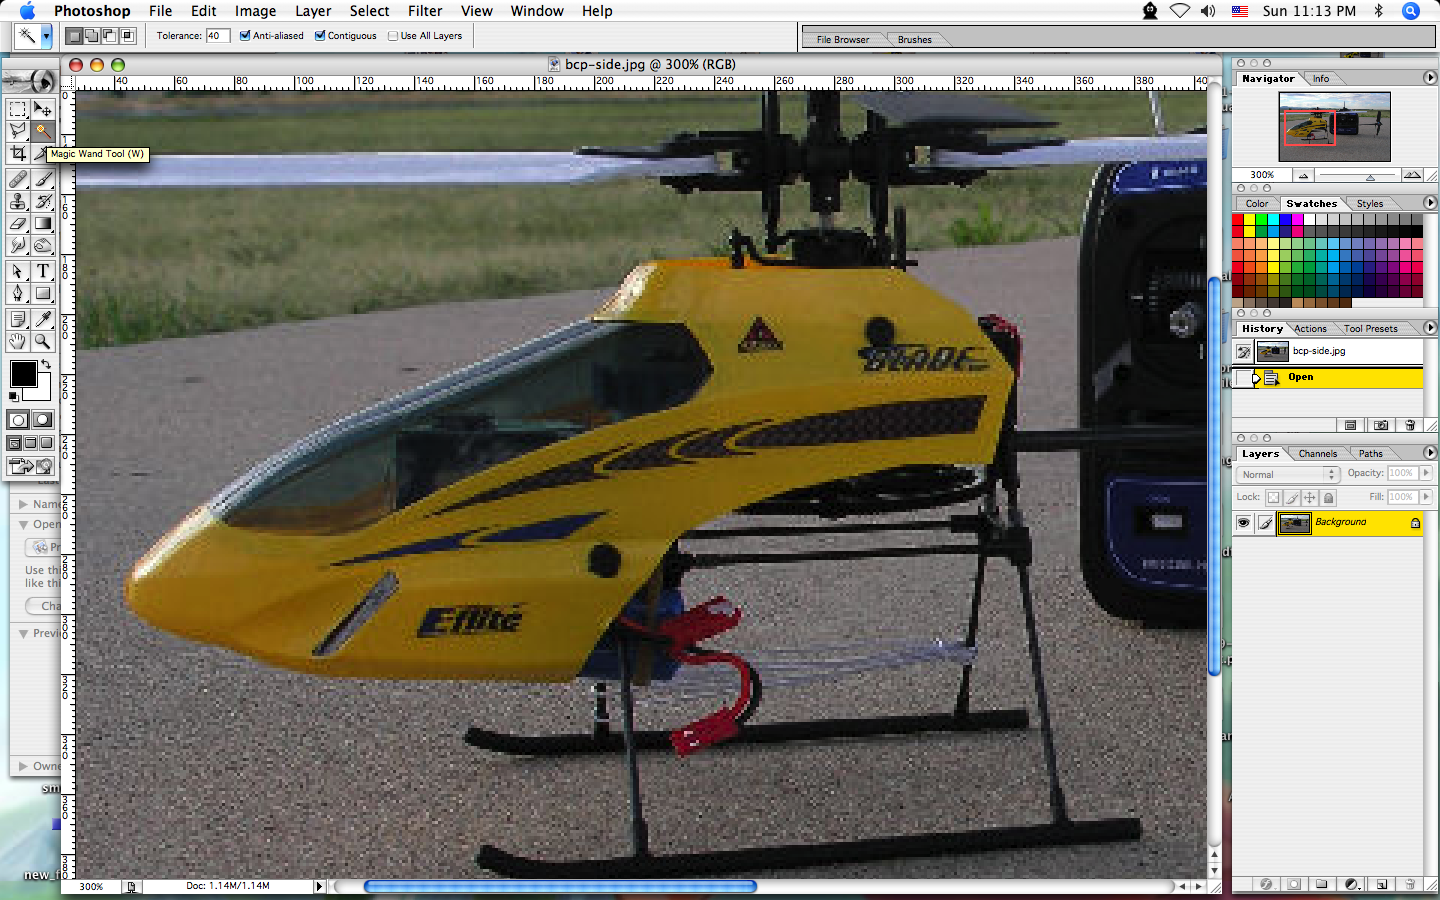
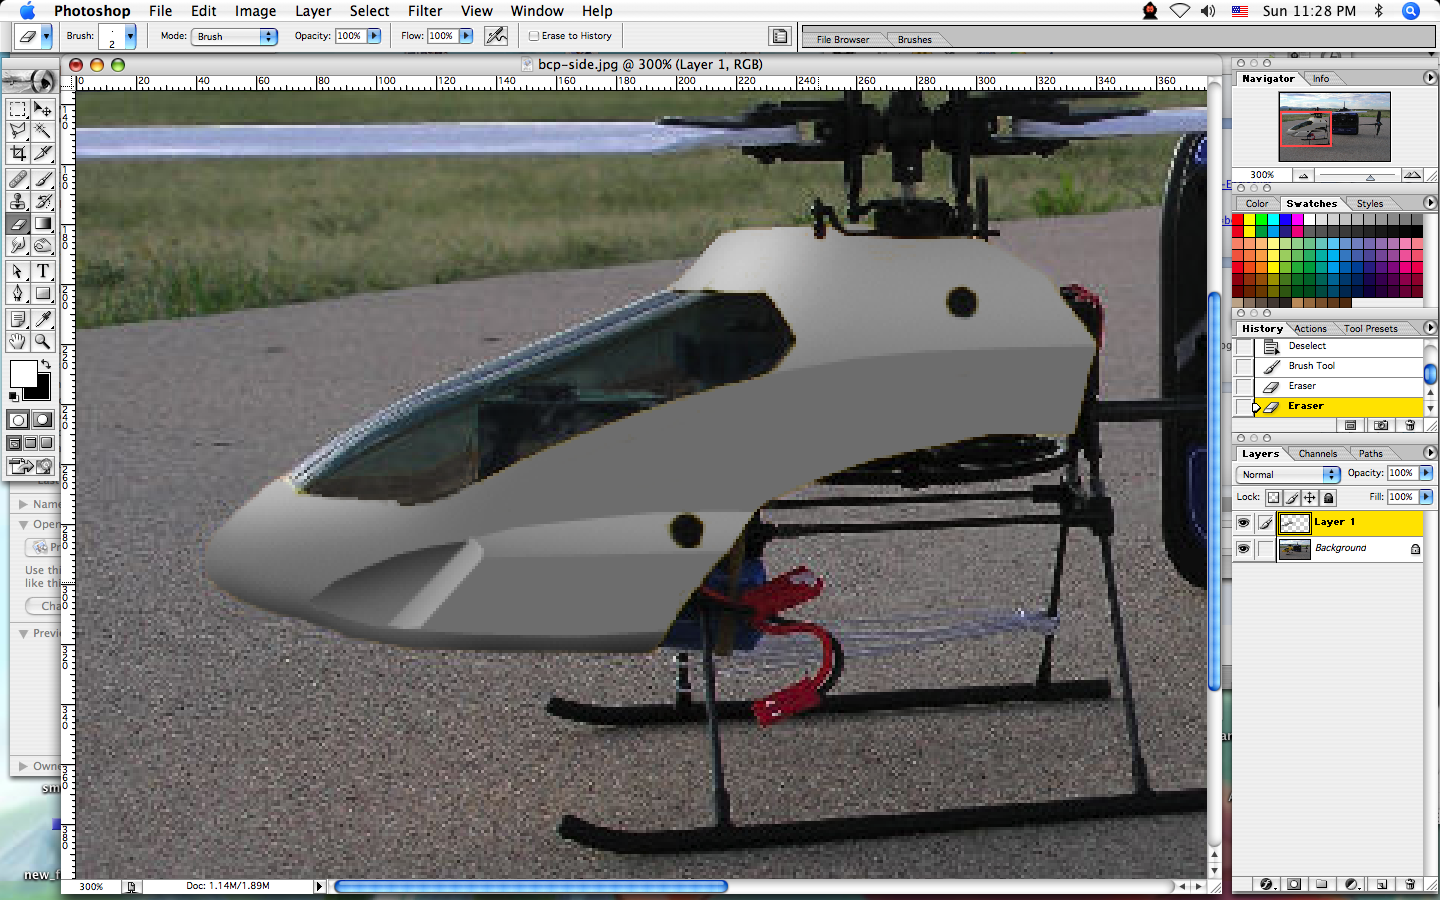
Get on the web and download a picture of your helicopter or other craft in a pose you like. I used google image search to find this picture of a Blade CP. It helps to find as big an image as possible; this makes the tools easier to work with and gives you a better quality picture. It will also be easier to use a photo in which the canopy is clearly contrasted against the background. Save the picture using your browser and then open it in Photoshop.
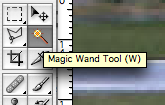
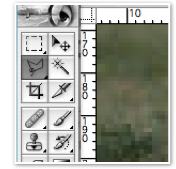
Select the wand tool and set the tolerance to a value around 40. The wand quickly selects large areas of the same color. A tolerance of 0 will select only pixels of the exact color you clicked on; we want to get anything that’s (in our case)approximately yellow.
Click on a part of the canopy with the wand and observe that most of the canopy is selected. If only half of the canopy is selected, hold down shift and click in another area to add to the selected area. If you make a mistake, just deselect all (press control-D) and start over. If your wand selected too much of the background, reduce the tolerance and try again.
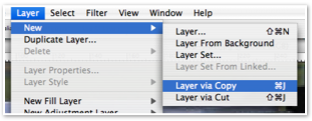
Now select Layer:New:Layer via Copy to duplicate the are you selected as a new layer. This will become our relief layer. Your goal is to cover up the original canopy in the photo. If it’s not already selected, click on that layer in the Layers Palette (look in the View menu if it’s not visible) to make it the active layer.
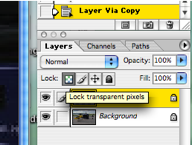
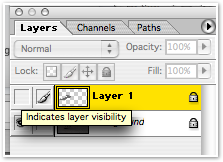
On the Layers Palette , click the Lock Transparent Pixels button. This prevents you from coloring any unused pixels in the next step.
Press shift-delete to fill in the new layer with 50% gray. This will not fill the whole picture with gray because we’ve locked the transparency. You should now be able to see clearly where the “holes” in the new layer are. You’re now going to fill them in. Unlock Transparent Pixels so that you can make additions to the layer.
(If the original canopy is gray, you can use white or black or any other color to build your relief so you can see what you’re doing. But when you’re finished, remember to make the new layer 50% gray before proceeding.)
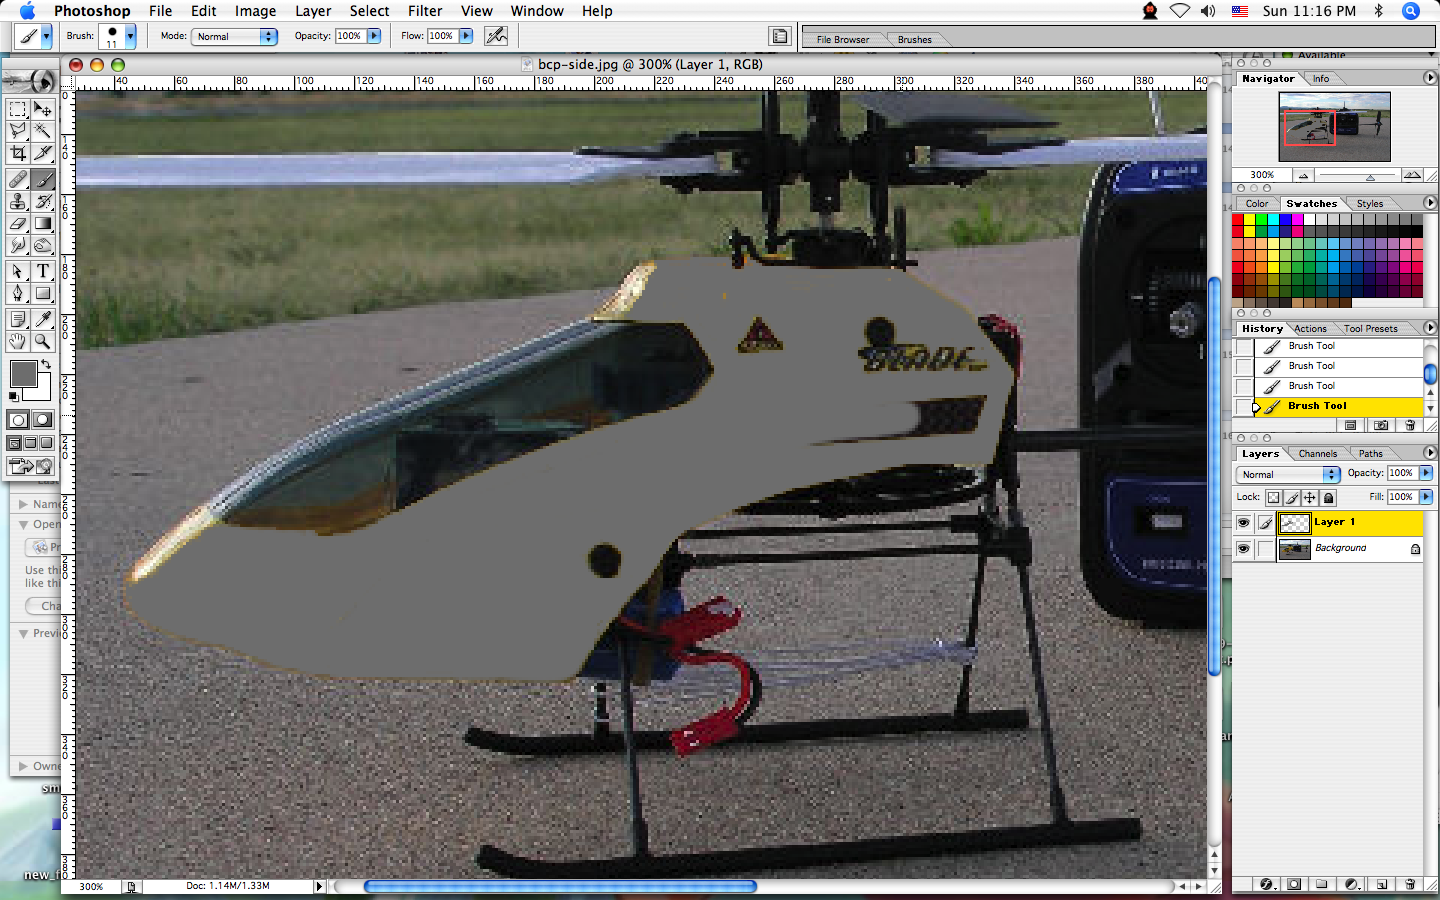
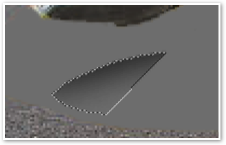
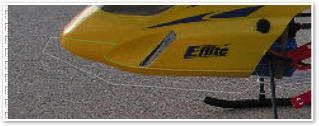
At this point you should have something like this. Most of the work has been done for you. Now you have to go color in the edges, and the decals that were not selected by the wand. I like to leave the mounting grommets because they’ll be visible in the final design.
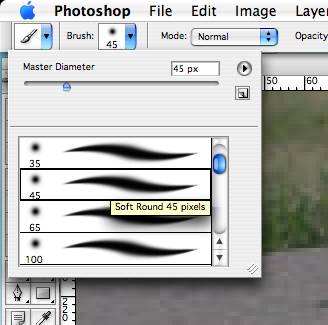
Select the Brush Tool and hold down alt while you click in the gray area you just created. This will “suck up” or Eyedropper the gray color into your brush. Now paint over the holes in the new canopy. If you can’t effectively work with the brush you’ve chosen, select a new Brush Size/Shape. It’s probably best to use a hard round brush. If you go outside the line or want to clean up an area the magic wand selected, use the Eraser tool to wipe out those pixels. Note that the background will show through when you do this.
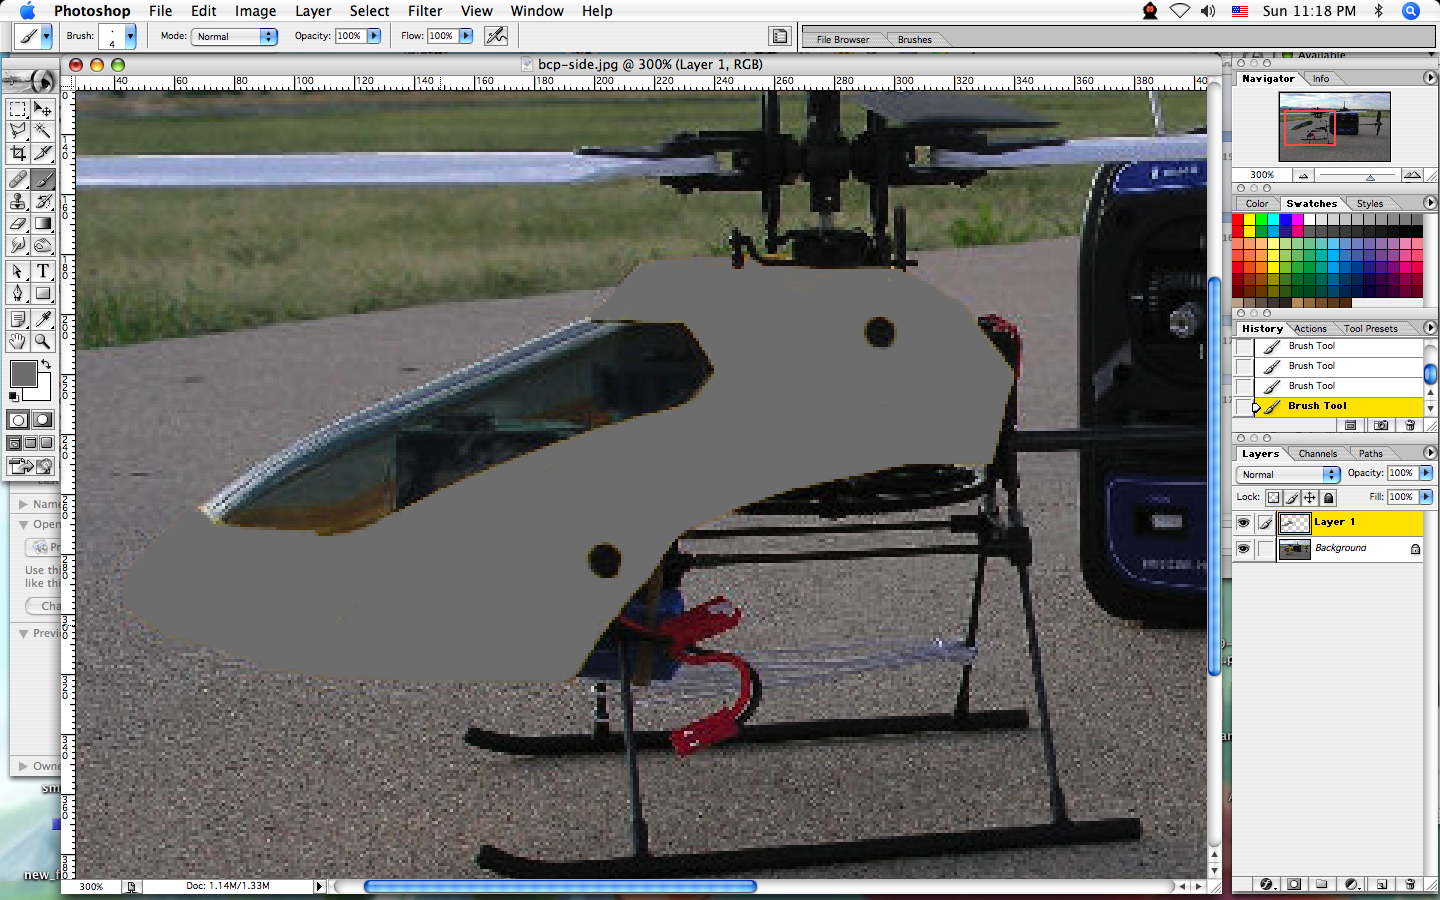
You want your new layer to look like this. The original yellow canopy is completely covered with our relief layer in flat, neutral gray. Lock Transparent Pixels again because you’re done changing the shape of the canopy.
Now you will give the relief layer that 3-D look. Fortunately, 3-D is much easier in Photoshop than it is on the field. We’re just going to shade parts of the canopy with white and black.
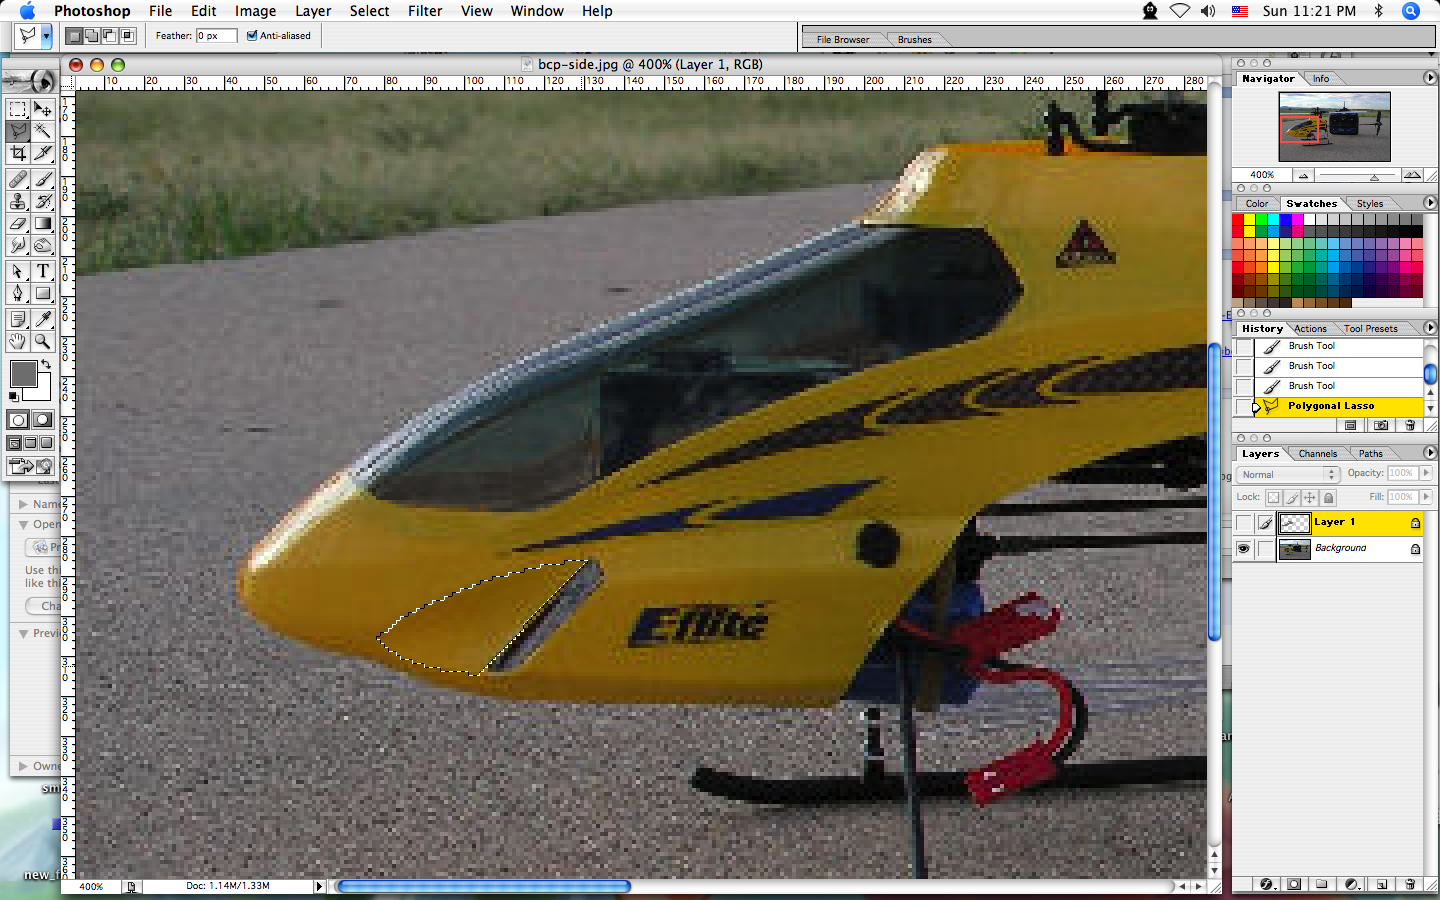
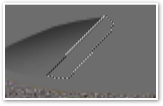
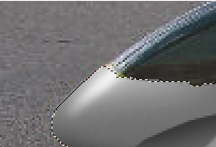
Hide the Layer you just made by clicking on the eye icon in the Layers Palette. Don’t worry, it’s not gone, it’s just invisible because you need to see the details underneath it. You should now be looking at the original image again. Select the Polygonal Lasso tool by repeatedly pressing shift-L or holding down the mouse button on the Lasso tool. I’m going to start with the “intake port” on the front of the canopy. It has a concave surface so it’s shadowed on the top.
Click around the outline of the port to establish the shape as a Selection. When you reach your starting point, click once again and the shape will be closed. If you “missed” anywhere, just Deselect (control-D) and try again.
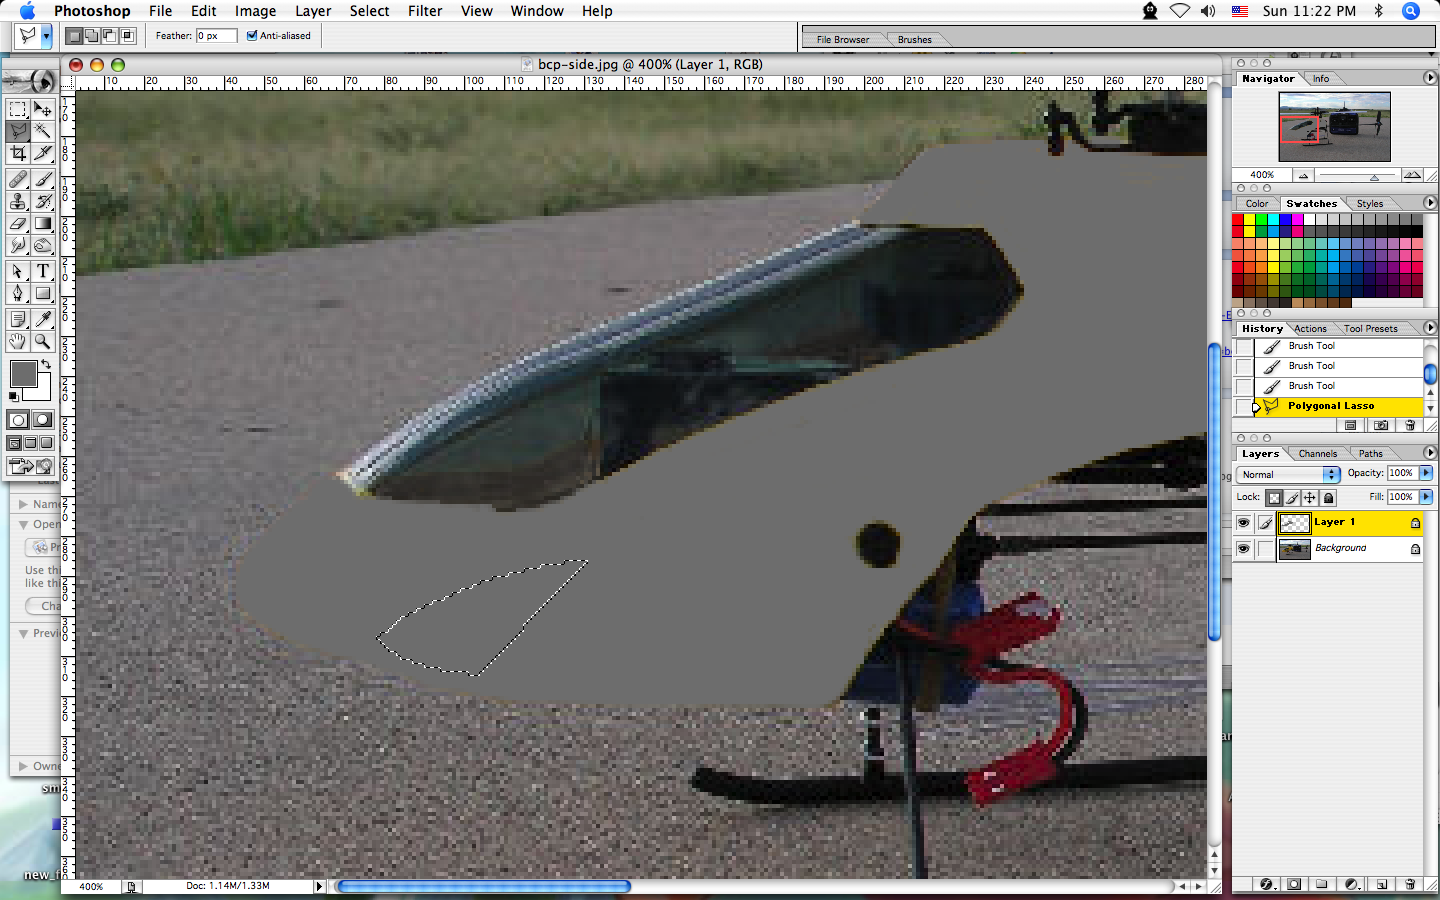
Now Unhide the relief layer by clicking on the eye. You should now see the relief layer again. Because only part of the image is Selected, your tools won’t affect any part of the image outside the intake port.
You’re going to paint the shadow on the top of the intake port. To get black ink, click on the little black and white box next to the color selector. Select the Brush Tool again and select a fairly large soft round brush. You probably don’t want an intense black so use the Flow or Opacity setting to make it more subtle.
Make a single horizontal stroke over the top of the port. Hold the center of the brush above, and well outside of, the outline. You should see a soft concave shadow appear inside the selected area. If you don’t like it, just hit Undo (control-Z) and try again.
Now Hide the Relief Layer again and choose the next area to work on. I picked the intake screen (the decal). It’s a flat pane that faces upward, so it’ll be lighter than the rest of the canopy. Make the relief layer visible again.
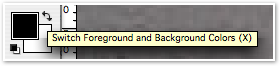
To get white ink, click on the two-headed arrow next to the color selector. This will Swap the Foreground and Background Colors that you recently picked to be black and white.
This surface is flat, not curved, so you want to paint it a solid color. Make one sweep with the brush over the center of the area.
Now continue with all of the relief areas on the canopy. Remember to paint the top edge with white and the bottom edge with black. When you paint at the edge, be sure you select a little background too as shown in the picture. If you don’t, you’ll have a “halo” around your canopy when you finish. Photoshop won’t let you “paint outside the lines” because you locked the transparent pixels.
Remember that the transparent pixels are locked, so you can work without a selection (basically freehand it) near the edge. I did the top of the nose and the area under the forward blade without selecting anything.
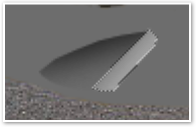
When you’re finished, the relief layer should look something like this. Basically, it should give the impression of a flat gray canopy. If it doesn’t have convincing depth, back up and try again. Photoshop lets you back up as many steps as you have memory for.
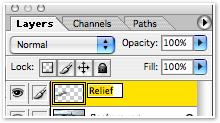
Click on the “Layer 1” name in the Layers Palette to Rename the layer to “relief.” This is strictly for your own sanity; it does not affect what the drawing tools do.
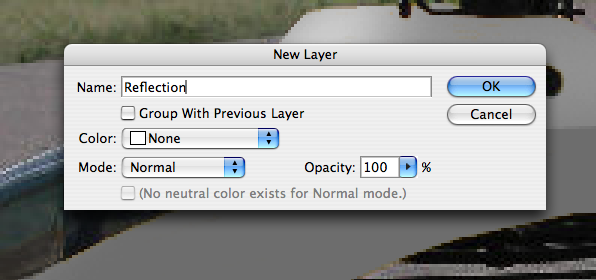
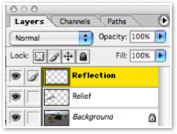
Now you’ll create the other two layers. Since the “reflection” layer is mostly empty, select Layer:New:Layer to create a new layer, and name it “reflection.”
The layers are stacked in the list from the bottom up, as they would be in the actual image. The reflection should be on top, so drag it to the top of the list if it’s not already there.
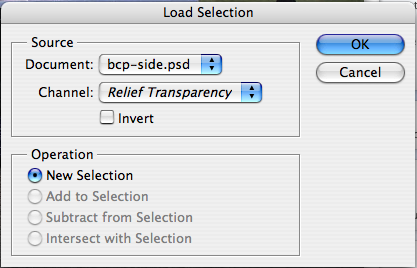
Now you’ll create the color layer. Initially it will be completely white, and it should be the same shape as the canopy. Photoshop has a handy way to save doing all that painting work a second time. Select the relief layer again and Select:Load Selection to create a new selection the same shape as the relief layer.
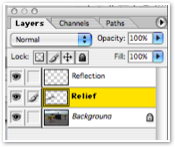
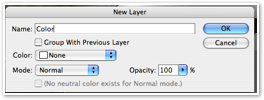
Now create another new layer, named “color.” Select that layer and press shift-delete, filling the new layer with white. Use the Layers Palette to arrange the color layer between the relief and reflection layers. Lock Transparent Pixels in the color layer.
While you’ve got the selection loaded, go back to the reflection layer and give it a few strokes of white with a soft round brush. I chose to highlight the top of the nose and the top around the rotor. Use the existing reflection as a guide. You can hide the color layer to make it easier to see your work.
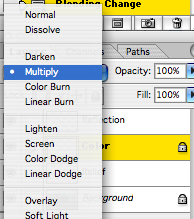
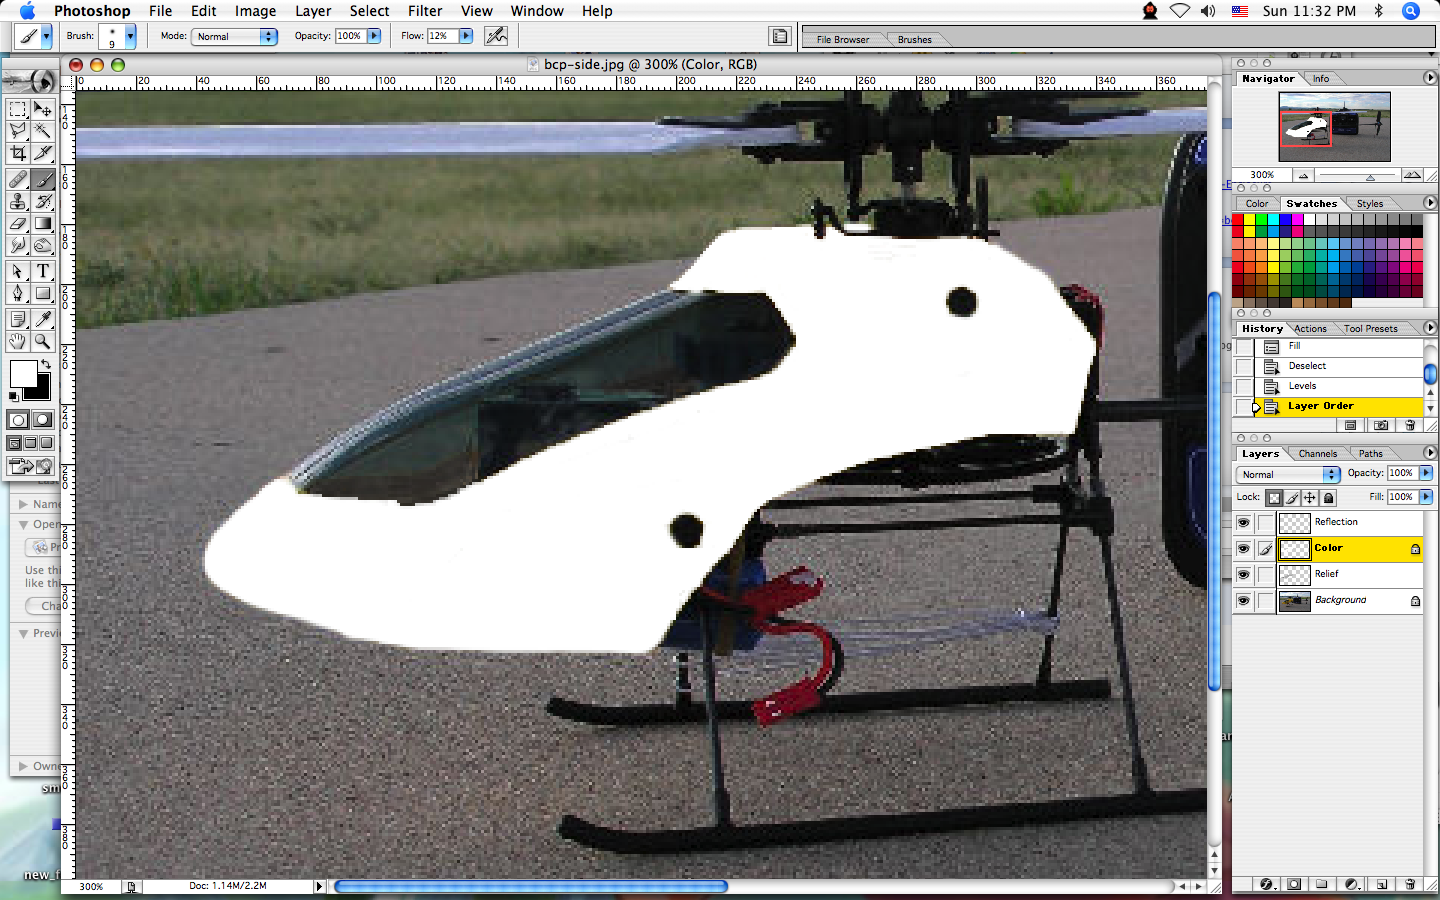
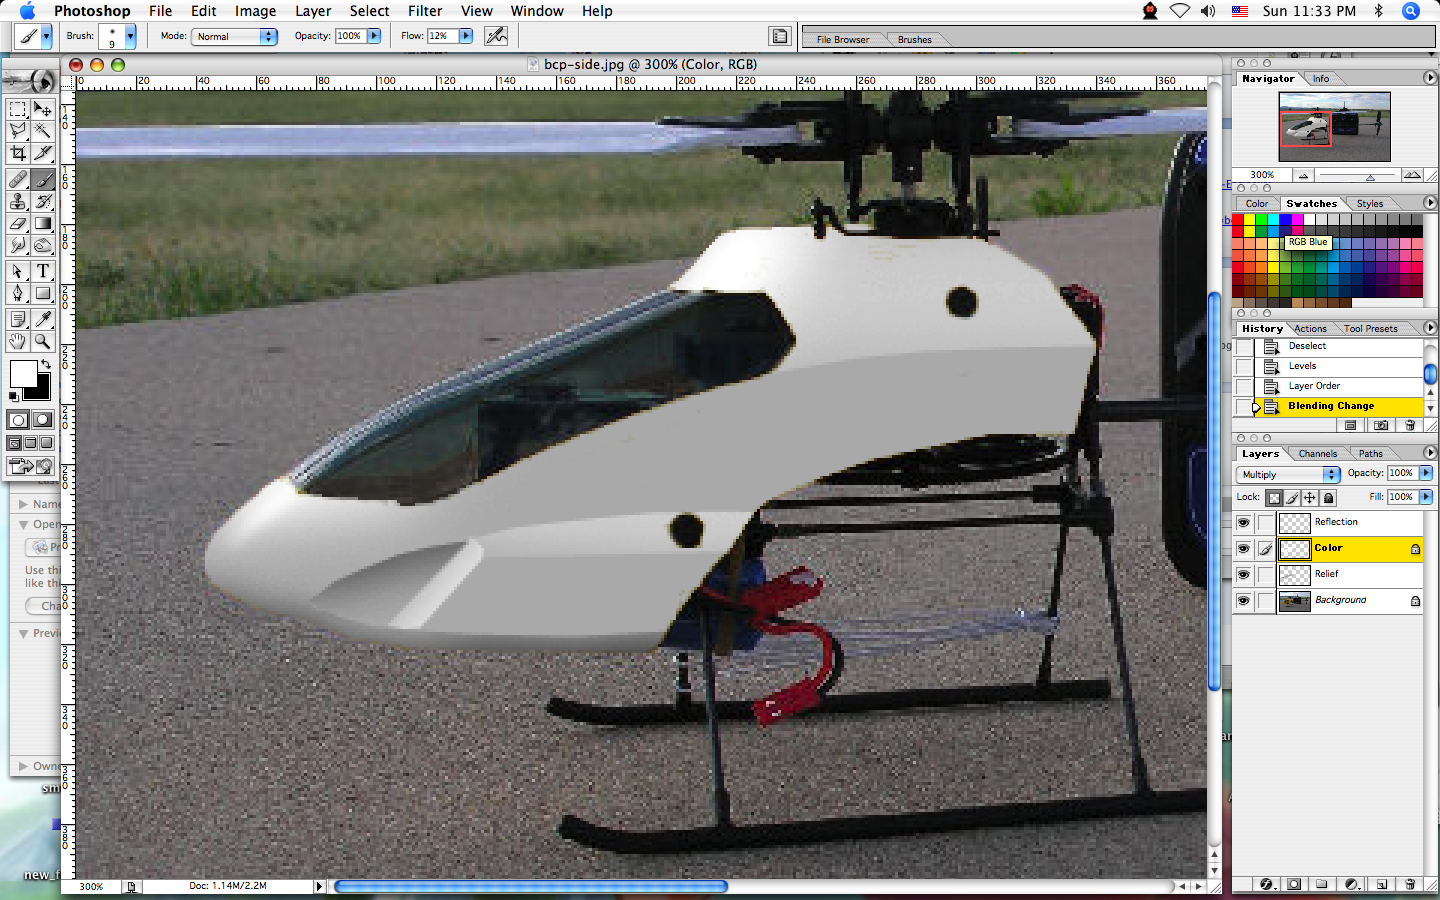
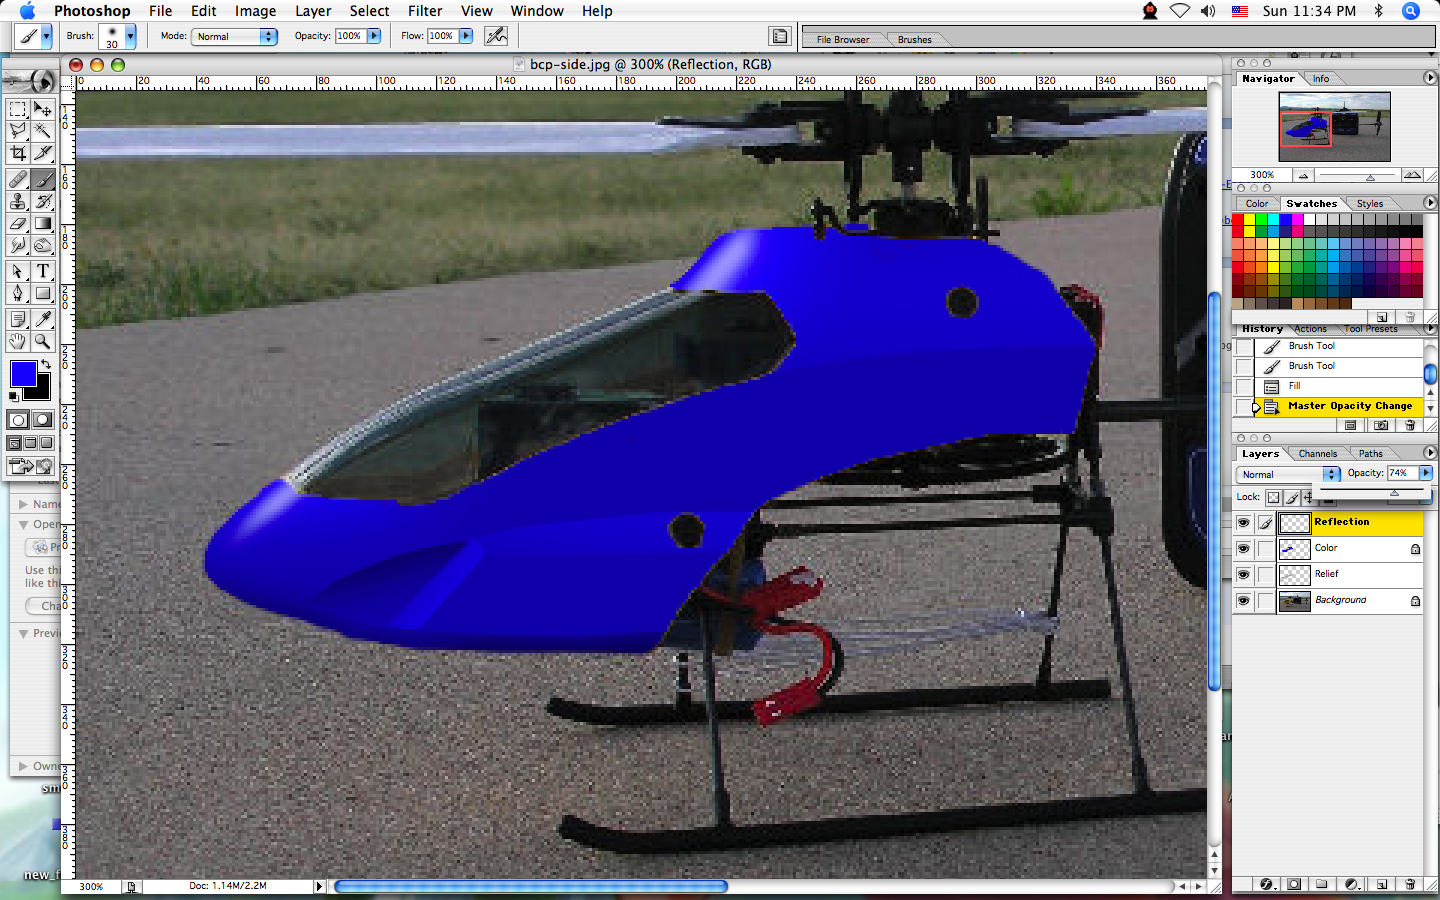
Now the color layer is there, but it’s not allowing the relief layer to show through. To make the color layer transparent you will change the layer’s Blending Mode. Select the color layer and click on the blending mode control (it says “Normal”.) Select “Multiply” instead. In multiply mode, the layer’s color is composited with the colors underneath it. Since the underlying layer (relief) is painted in grays, it has the effect of darkening the color layer.
This is what you should have so far. Since the color layer is completely white, it doesn’t look any different than the relief layer. Before you go on to color the model, you should brighten up the relief layer so that it doesn’t make your colors dull. You want to equalize the relief layer’s colors so that the brightest part of the layer is 100% white.
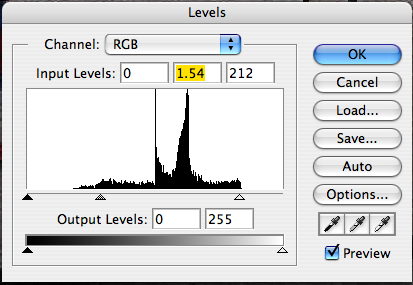
Select Image:Adjustments:Levels. The Histogram will appear. Underneath the histogram are three triangles representing the white, gray, and black points of the image. Drag the white point to the right edge of the histogram, and drag the gray point to the left as shown at the right. This has the effect of making the brightest part of the relief layer pure white, and the darkest part just under 50% gray. The picture should look like a plain white canopy.
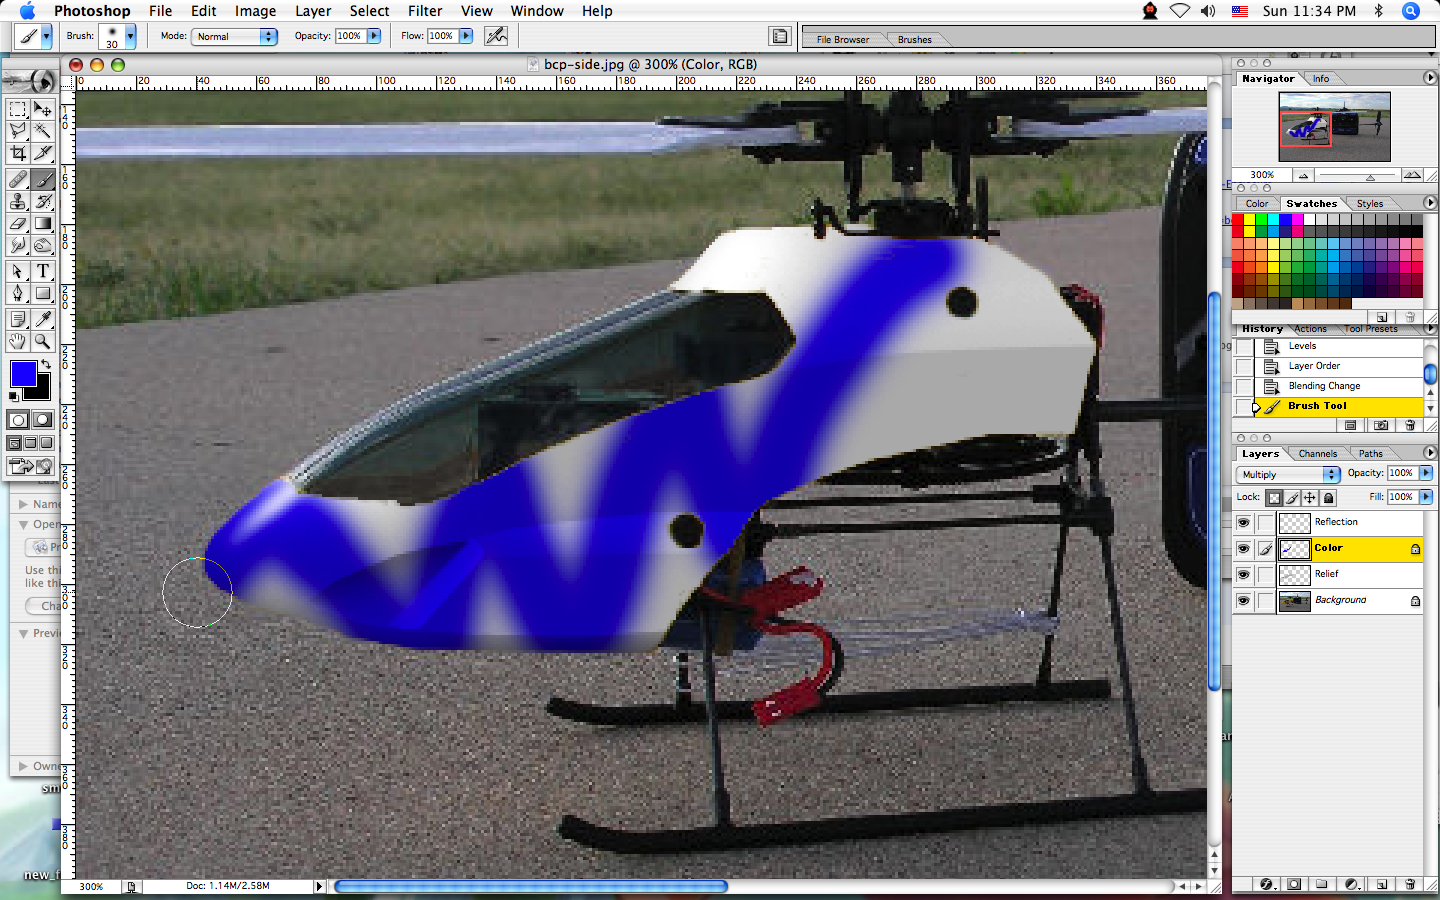
Now it’s time to paint on the canopy. Select a brush (or any drawing tool), and a color (either from a swatch or by clicking on the color selector. Make sure you have the color layer selected, and paint away. Notice that your color is tinted by the underlying relief layer, and it looks “shiny” where you painted the highlight layer. And that’s it. Be creative!
Use a virtual helicopter to try out images and color schemes


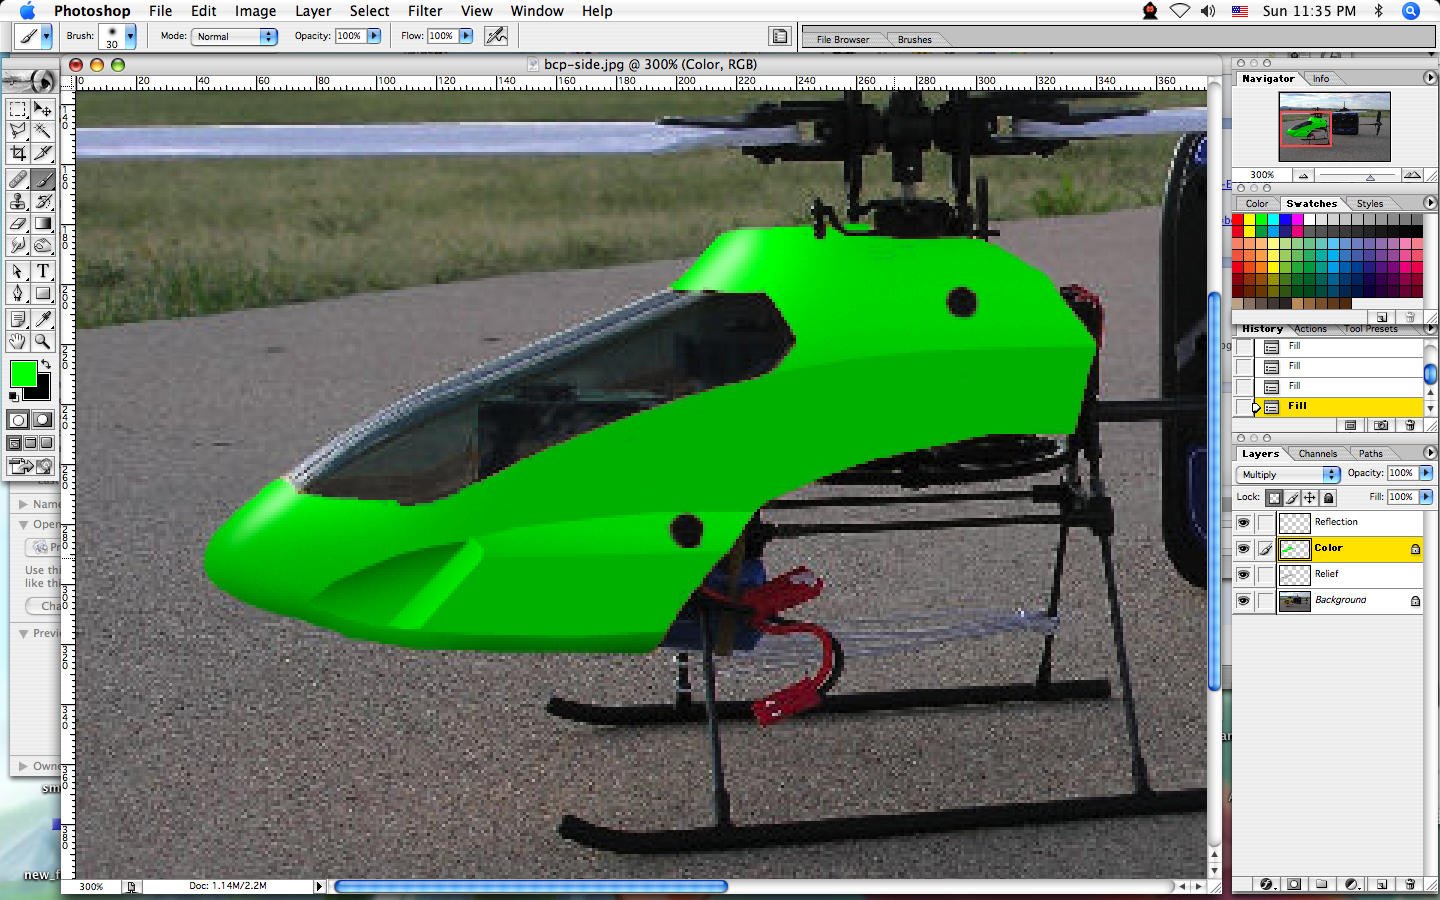
Here’s a solid blue BCP, and a “slime green” one.
This one I call “The Cheat.”
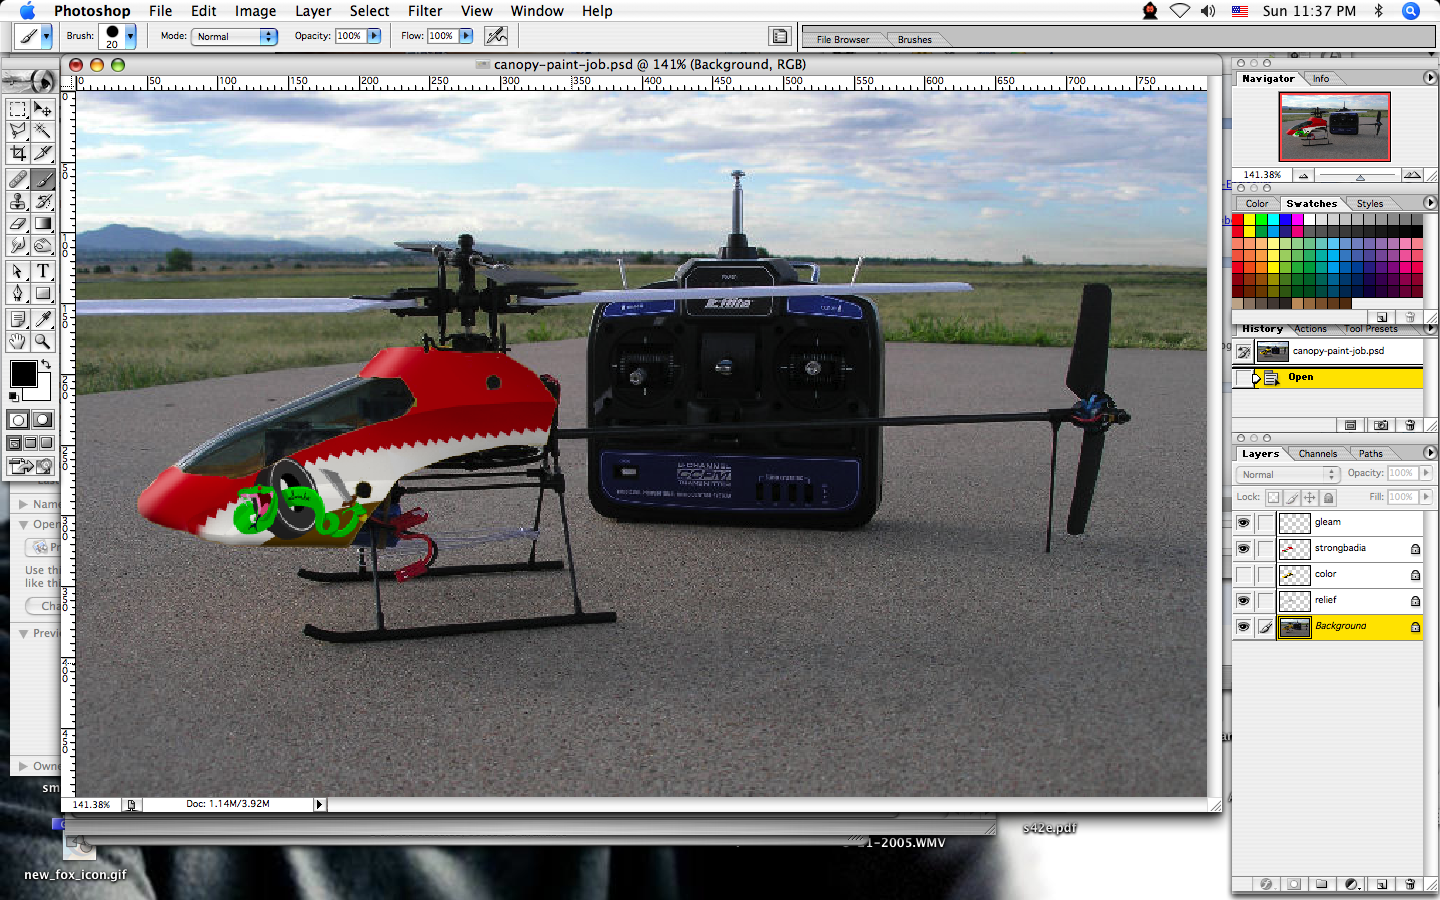
Note that you can also paste images into the color layer. Don’t you wish you could paint them this easily?
Feeling lazy?
If you have a BCP, you can just download my Photoshop file here. If you make a similar image for another helicopter, please email it to me so I can make it available for downloading.