The holography rig consists of a piece of plywood (actually an old shipping crate lid, hence the "Eye Tracker" stencil), balanced on four pieces of closed cell foam from a computer shipping box. (The eye tracker itself was a thing to behold...)
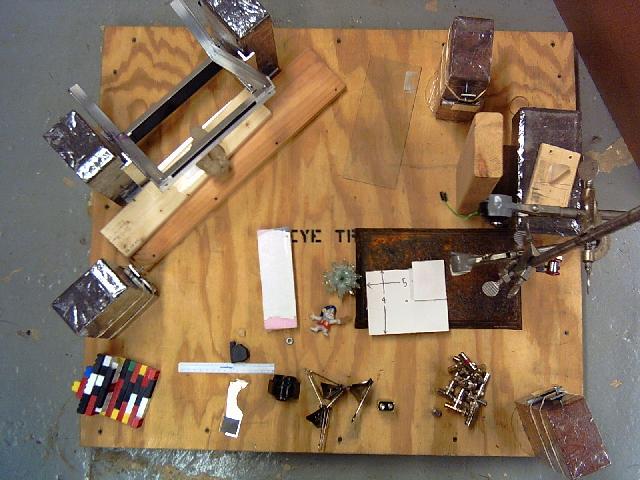
This is looking more or less straight down on the "optical platform". The laser beam enters on the right side, about 1/2 way up the side, and goes into the prism on top of the boards and brick. The prism is the beam splitter. The benefit of a prism, as opposed to a flat piece of glass, is that extra reflections don't go parallel to the desired reflections, so they are easy to get rid of. (there is an extra reflection which goes almost directly back at the laser)
The reference beam bounces off the long side of the prism, through a 10x microscope objective on the ring stand, and goes straight down the right edge of the table. Its pretty clean, for not having a spatial filter. On the bottom right corner, there is a mirror, which steers the beem (about 3/4 of an inch wide when it hits the mirror) up to the film holder in the upper left corner.
Note the 2x4 to the left of the beam splitter prism. Thats a beam block, catching a bunch of gunk which came off the laser, around the prism. (time to clean the output coupler...)
The object beam comes off the left side of the prism, at about a 45 degree angle towards the top edge. Thats the problem with prism beam splitters... The two beams are not exactly orthogonal. The brick on the top right bounces the object beam to the brick on the bottom left, which then directs it into the subject (quartz crystal) under the film holder.
Note that the film holder is at a 45 degree angle. The square-on view looking at the film is actually 45 degrees down into the table. That made all the optics coplanar, with the problem that the object stage is tilted. (At this point, I'm more worried about simplifying the optics, than the object.)
Also note that there is no diverging lens on the object beam, it just plows into the object. That works for this subject, (its a big quartz crystal) it glows internally.)
The film is 1/4 of a 4x5 sheet. The film holder is designed to hold an entire 4x5 sheet, the 1/4 sheet is thus off center, but I took that into account when I aimed the beams.
The reference beam is 39 inches long. The object beam goes through a couple of arguably extra bounces, to get it to be 40 inches long. The laser's coherence length is about a foot, so we're pretty good.
The reference beam is 1.47 micro watts/cm^2. The object beam is 1.55 micro watts/cm^2. So we're balanced... The film is Slavich PFG-01, which allegedly wants 80 microjoules/cm^2. So the exposure will be 80/(1.47+1.55) or about 26 seconds.
The film was loaded into the film holder (two sheets of glass, with an electrical tape L on one to line the film up to). The glass is then clipped to the film holder frame with four binder clips, and then the two pieces of glass pushed together several times, compressing the film and hopefully squeezing any air bubbles out. I then drummed my fingers on the glass, to encourage any movement which was "thinking about it". I have less confidence that procedure is adding anything, but its cheap.
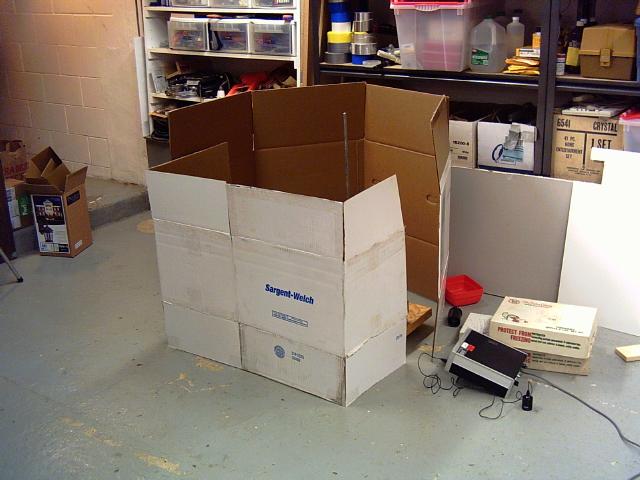
The optical platform was then surrounded with its cardboard fort (not touching the platform itself) to avoid stray air currents knocking optics around. The settling time, to let any vibration from loading the film damp out, was about five minutes. I have observed, empericly, that its real hard to read with a safelight...
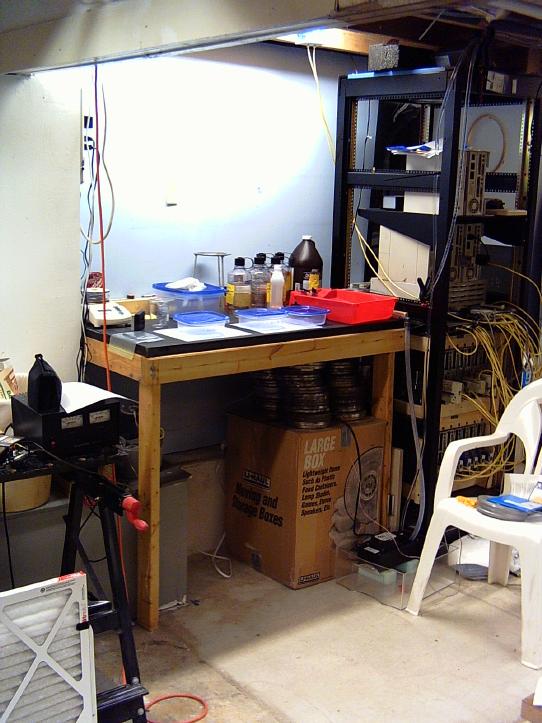
After the exposure, the film was developed in JD-2 developer for six minutes, washed in tap water for three minutes, then bleached in JD-2 bleach until 30 seconds after it went clear (which was a bit over one minute). It was then washed in tap water for another three minutes, and dried in 91% isopropyl alcohol for about one minute. Finally, it was blotted with a paper towel, and then balanced vertically on the towel till it was dry.
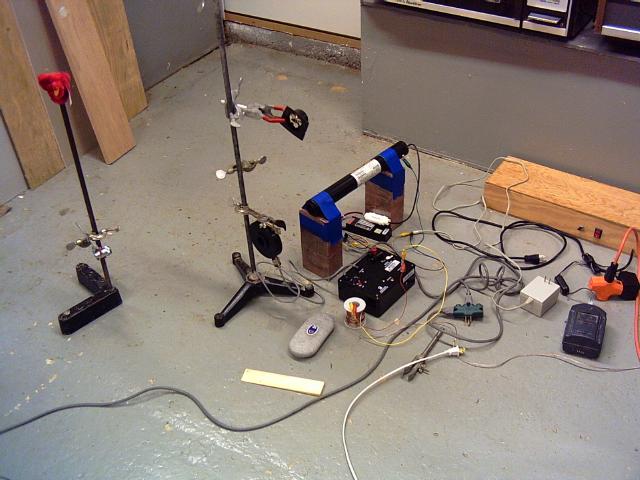
One interesting bit of hardware is the film washing tray. Its the red thing on the right side of the bench. Its an ex paint tray. Water flows in the top from a piece of vinyl tubing, washes off the film, then flows out the bottom through another piece of vinyl tubing. The drain goes into a condensate pump (black thing in a transparent plastic box on the floor by the chair), which pumps the water back to the washing machine's drain via another piece of vinyl tubing. I have to go through all that trouble because the sewer in the house is about 4 feet off the basement floor.
Finaly, I put it into the light from a filmstrip projector, and went "Whoa!" (no it didn't reconstruct, its a transmission hologram, but the diffraction pattern was impressive). In a laser beam, the object actually reconstructed correctly, I got an image on the first try :-)
This hologram was significantly brighter than any of my Denisyuk holograms. Of course the still-video pictures didn't give it any justice. (But then, my still-video camera is only a step or two above things like the Barbie digital camera...).