There's probably some documentation that explains this problem out there, but I couldn't find it, so after stumbling over it for months and eventually figuring out the solution, I am assuming that somebody else would love to know what it is and am therefore posting it here.
If you're like me you have a cheap laser printer like a laserjet II/III, and you use GhostScript to print nice-looking output from PostScript files. If you're experiencing the same problem I have, your pages aren't centered, though. You tried to set things up correctly in your word processor, but your resume is still coming out of the printer looking like it's ready for a three-ring binder. Well, here's how you can eliminate the problem once and for all. Incidentally, I believe this information applies to any printer used with GS but I have only encountered the problem on my HPII.
GS includes a file called (in my distribution) align.ps, which is actually there to help you solve this problem, although there isn't much of a clue as to how to use it or that it's even there. Find it and print it out as you would any PostScript file. For me, it went something like:
gs -sDEVICE=laserjet -sOutputFile=align.pcl /usr/local/share/ghostscript/5.50/align.ps
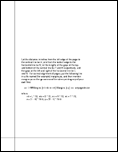
The output should resemble the illustration below:

The instructions (for what they're worth) are printed in the center of the page, but they could benefit from a little further explanation. First, measure the following dimensions with a ruler on the page you just printed:
These numbers (H, V, T, B, L, and R) indicate the mechanical margins of your printer, i.e., the actual physical bounds of the area it can print on. They also can be used to find out where the origin of your printer is relative to the corner of the paper. For my laserjet, it came out:
Now use the formula at the bottom of the page (align.ps) to convert those numbers into points. The resulting figures go into the small bit of PostScript code shown at the center of the page. Again, using my HPII as an example, the result is:
<< /.HWMargins [18 18 18 13.5] /Margins [-75 0] >> setpagedevice
Note that GhostScript will require that the code be padded with spaces exactly as you see it above. If you attempt to type it in it probably won't work right, so just copy and paste it from align.ps, changing the "ml mb" etc. to the appropriate numbers.
Now save the code in a file called "margins.ps". Here's where the instructions start to get a little wacky. The file says you're supposed to "mention margins.ps" to gs when printing. Unfortunately, computers are still a little too primitive to handle allusion as a form of input, so you need to be a tad more assertive. Here is how I do it:
gs -sDEVICE=laserjet margins.ps file_to_print.ps
Naming multiple input files in this manner causes gs to concatenate them, which in this case makes margins.ps part of every file you print. If you are using if or a similar technique to automatically print PostScript documents, all you have to do is add margins.ps to the gs command line.
That's pretty much it. If you measured and computed the numbers correctly, your output should print exactly as composed henceforth. If you use multiple output devices, you will obviously have to come up with a different margins.ps file for each one, and you will need to repeat the process for different paper sizes as well.
I hope this saved you a lot of aggravation, because I didn't enjoy learning it the hard way, especially since I was working under a term paper deadline.
This document, and all other documents, images, and other files contained within this site are copyrights of their respective owners. No file may be duplicated without explicit written permission of the author unless permission is otherwise noted here.